Picture Package in PhotoShop: (Tutorial)
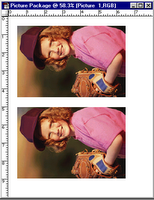
Photoshop is powerful & flexible photo editing tool through which we can do almost all kinds of photo editing work here I am describing that how you can create picture package in Photoshop. Picture package is one of it’s best features. It is nothing but multiple copies of an image in a single page this multiple copies of images can be of same size or different size.
Picture package let’s you customize in many ways you can choose from a different sizes & different placement options
This is very useful for photo studios through this they can make array of passport or stamp size photographs quickly or they may create a package of different size using same image.
Creating picture package:
Here are the steps to create a picture package
Step 1: Scan a photograph for which do you want to create a picture package with yours favorite scanner & save the file with an appropriate name.
Step 2: Start ‘Photoshop’ package.
Step 3: Click file > Automate > Picture Package option.
Step 4: Picture Package dialogue box will be appeared on your screen. Choose an image for which you are intended to create a picture package by clicking ‘Choose’ button or if you already have the source image opened on your screen then select ‘Use front most document’ check box..

Step 5: Choose Layout from the layout option, picture package dialogue box also shows preview for selected layout
Step 6: Input resolution values for the package in resolution option.
Step 7: Choose appropriate color mode & click ‘Ok’ to create picture package.

Customizing Layout:
You can also customize layout according to your needs when you can’t find layout of your choice in layout option predefined layouts are store as a text file in “C:\Program Files\Adobe\Photoshop 6.0\Presets\Layouts”
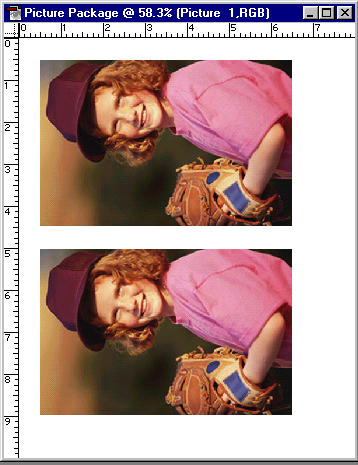
These type of text file can be created according to your needs. You can create new layouts or edit existing layouts by using any text editor like ‘Notepad’ or DOS’s edit command. Just suppose you want to create a new layout which has document size 8x10 inches where 8 is width and 10 is height of an image & this document will have 2 (4x6) size photographs. So let’s create this text file in ‘Notepad’ application here are the steps to do it.
Step 1: Start ‘Notepad’ application
Step 2: Enter this following line on the first line of the file.
I 8 10
Here ‘I’ is measurement unit in inches & 8 , 10 is width & height respectively of the document. You can also use other unit, like centimeter & pixels use letter C or c for centimeter & P or p for pixels.
Step 3: Second line of the file has ‘Caption’ that you want to appear in picture package dialogue box. Enter following line in the second line of the file
2 ( 4 x 6 )
Step 4: in the next lines enter the position & dimensions of image which you want to appear in the document type following lines in the file.
0.5 0.5 6 4
0.5 5 6 4
These above each line for each picture which you want to appear in the document. This lines have size & dimensions of the picture each lines have four values which is separated by a space. These values are for c1 r1 c2 r2 for the first line Where
c1=0.5
r1=0.5
c2=6
r2=4
& for the second line
Where
c1=0.5
r1=5
c2=6
r2=4

Step 5: Save this file with an appropriate name in
“C:\Program Files\Adobe\Photoshop 6.0\Presets\Layouts”
Step 6: Use this newly created layout in Photoshop by clicking file> Automate>picture package option. There you may find new layout, which you have created.
Step 7: Choose an appropriate image by clicking ‘Choose’ button & then click ‘Ok’ button to create picture package your picture package will be created. So by this way you can create as many job a file as your needs.
Creating multiple image picture package
By using picture package option we can create a package, of multiple copies of same image. It is also possible to create a picture package of different images in photo shop. This can be used to create catalogue of photos. This is known as contact sheet. Here are the steps to achieve this:
Step 1: Close all opened images, create a folder & copy all images into this folder, which you want in the catalogue.
Step 2: Click File>Automate>Contact Sheet II
Step 3: ‘Contact Sheet II’ dialog box will be appeared on the screen.

Step 4: Click ‘Choose’ button & specify folder name which contains images which you want to be appeared in the contact sheet.
Step 5: Under document options specify width & height of the contact sheet document & also specify appropriate resolution & unit of resolution & color mode.
Step 6: In thumbnail section you can specify layout of the document. By place option you can choose either ‘Across First’ or ‘Down First’. ‘Across First’ means images will be filled horizontally & ‘Down First’ means images will be filled vertically into the document. In thumbnails section also specify no of colums & rows that you want in contact sheet document.
If you specify 2 columns & 3 rows then total 6 images can be appeared in one contact sheet. If the folder which you have specified here has more images then according to no. of images more contact sheets will be created automatically.
Step 7: Select ‘Use filename as caption’ to give captions to images as filename & you can also choose font & font size for the caption.
Step 8: Dialogue box also shows preview for the contact sheet click ‘Ok’ button to create contact sheet.

Creating an action to automate the task:
An action is a series of commands like a batch file that you can play back. Through action we can automate any photoshop job for example you can create an action for creating Array of passport / Stamp size photos, just suppose you want to create an Array of 16 (2x3) inches images. Here are the steps to create an action for above job.
Step 1: Open an image for which you want to create an Array
Step 2: Open actions pallate by clicking window>Show actions.

Step 3: Click ‘Create new action’ button from action pallate.

Step 4: New action dialogue box will be appeared on your screen, give appropriate action name & also choose a function key for shortcut then press ‘Record’ button to start recording.
Step 5: Now we have to create a pattern for the image which we have opened so click ‘Select’ menu then choose ‘All’ from the menu.
Step 6: Go to ‘Edit menu’ & click ‘Define pattern’ option. A dialogue box will be appeared on the screen give appropriate pattern name & press ‘Ok’ button pattern of image will be created.
Step 7: This pattern can be filled in any document so create a new file by clicking File> New give appropriate value for the width, height & resolution & choose color mode & then press ‘Ok’ button. Here I am giving width as 8 inches & height as 12 inches.
Step 8: Click ‘Edit’ menu & choose ‘Fill’ option from the menu. ‘Fill’ dialogue box will be appeared on the screen under contents select use ‘Pattern’ from the drop down list & from the ‘Custom pattern’ choose pattern which you have created under ‘Blending’ choose appropriate mode & opacity & then press ‘Ok’ button & that’s all recording job is over.
Step 9: Now stop recording by clicking ‘Stop recording’ button from action pallate.
Using an action
Follow the steps to use the action –
Step 1: Open an image for which you want to create an action.
Step 2: Press the shortcut key of action which you have defined. Action will be played & array of passport size photo will be ready automatically. All jobs which

you have defined in action will be done automatically. By this way you can create as many actions as you need. Actions can be saved for future use. To save an Action first you need to create an action set by clicking ‘Create new set’ button from the action palate & then create new actions & save the actions by ‘Save Action’ options from the action pallate further this action can be loaded by choosing ‘Load Actions’ option from the action pallate. Action can be created for any job it saves our valuable time.
Technorati Tags: Photoshop ,Picture Package , How to


